Being born and brought up in Maharashtra, the Ganesh festival holds a special place in my heart. A few weeks before the festival, you can sense the excitement building up. The shops selling Ganesh idols start mushrooming everywhere. People are talking enigmatically about their ‘makars’, discussing decor ideas, making shopping lists, and booking their train tickets for their hometown. The shops start buzzing with colourful displays of decor items, garlands, diyas, and rangolis. Homes start getting cleaned and dressed up for the arrival of the Lord and groceries are stocked for making sweets and savouries for the festival. You can hear the ‘dhol tasha’ bands practising till late into the night.
As the Ganapati fever rises, I love soaking in the entire experience – the anticipation before the Ganesh Chaturthi; the wait for the get-togethers, prasad, elaborate meals, aarti, ringing of bells, and pandal hopping.
But the thing I love the most about the festival is the idol of Lord Ganesha himself. I make sure to visit all homes I am invited to for ‘darshan’. Each idol is unique and lovable in its own way and radiates a positive energy that touches everyone around it. It’s magical the way our lives surround the Lord those few days that he is with us.
It is because of this fascination with the idol that I decided to make a simple Ganesh Murti of ‘shalu mitti’ myself. I approached Nilesh sir, who conducts Ganapati idol-making workshops every year. Not only does he make Ganesh idols of clay but also of fruits and vegetables.
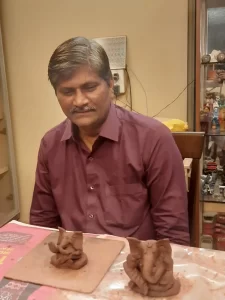
Let me share with you my experience of transforming a piece of earth into my little Ganesh idol in 6 easy steps.
How To Make Easy DIY Eco-Friendly Clay Ganesha At Home?
Construction Time: 1 hour
Things you will need to make natural clay Ganesha
- Natural Clay
- Water
- A sharp tool to make the eyes and give texture
- A plastic sheet or a ceramic or marble tile with a smooth surface
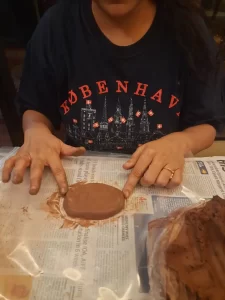
Step 1 – Let’s Construct with the Base
First, make a flat base like the way you would flatten roti dough. Smoothen the edges with your palms. The base should be big enough to hold the abdomen and legs.
Step 2 – Make the Torso
Roll out a ball and fix it on the base. Press the sides of the torso onto the base to hold it together. You may also use a toothpick to fix the belly to the base. This way these parts will stay together after drying.
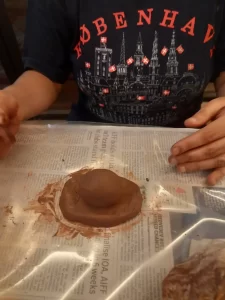
Step 3 – Make the Head and Trunk
Let’s now make the part for which The Elephant God is known – his head and the curved trunk. Take a portion of the soil, make a ball, and start rolling one side of the ball into a log to make a trunk. Fix the head over the torso (you may also use a toothpick). Curve the trunk on one side. Make sure you press the edges and merge the abdomen and head so that it doesn’t fall off once it is dry. Use water when required to brush at dry places.
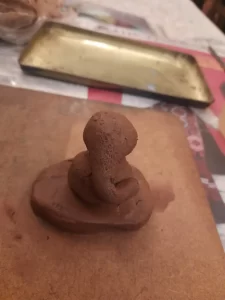
Step 4 – Make the Hands and Feet
Let’s give our Bappa some action! Have you noticed the numerous seated poses of Ganapati and how the position of hands and feet makes all the difference? There are many poses that we could experiment with but let’s do the simplest first.
Roll out 2 portions of soil into cylindrical shapes for making hands and feet. Adjust the length according to the size of your idol. Roll one portion to make the legs. Flatten out the edge on one side to make the foot (you can pinch the edge). Smoothen out the parts to make them seamless.
Roll the other portion in the same way to make the hands. Position in a way that the right hand is flattened out to show a blessing pose. Ensure that the hands are properly fixed to the body.
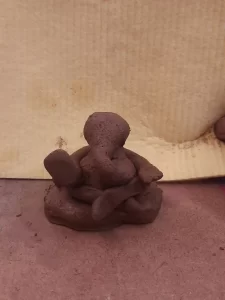
Step 5 – Make the Ears
Our clay Ganapati murti has begun to take shape but let’s not forget the big EARS! Flatten out a small round and cut it in half. Press the pieces inward to give them the shape of an ear. Now fix it onto both sides of the head.
Our Ganesha is almost done. Take a moment here to check the shapes and smoothen out the edges to give it a finished look. To spread evenly, use water if the clay has dried.
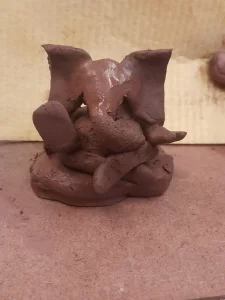
Step 6 – Make the Eyes – The Soul of Your Idol
Be very careful for this part. Take any sharp, pointed object (knife, pen or clay tool) and carve out the eyebrows and the eyes. Take 2 small, round-shaped beads of clay to make the eyeballs.
Now do the finishing touches. With a sharp object, make the fingers and toes. You can also adorn the Lord with a tikka on the forehead, kadas, and anklets made of clay.
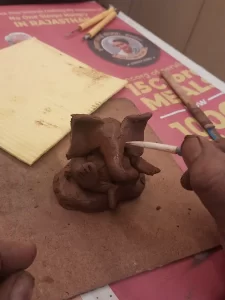
And Voila, your own little Clay Ganesha is ready. If you wish to colour it, wait till it dries completely in 2-3 days.
Why is a DIY Clay Ganesha Workshop Important for Children?
Teach your kids to make eco-friendly Ganpati at home. It is a great way of teaching children the importance of doing things with their own hands. In an age where everything is available at the tap of a finger, such activities will make children appreciate the beauty of connecting with the real world at a slower pace. It will also help them understand the importance of adopting sustainable practices. Let those little hands make their own little Ganesha.
Conclusion
Art is both creation and recreation. It was immensely satisfying to make my Ganesh idol with my own hands. When the idol starts taking shape under your gentle hands, you feel an enormous sense of belonging.
I had a long, tiring day and had almost given up the idea of doing this this little project. I felt it would be too time-consuming and exhausting. But it was surprising how refreshed I felt after completing my clay Ganesha.
Life is full of interesting things that we keep postponing because we don’t have the time for them. But when you do make time and indulge in activities that interest you, you realize how much joy these little things are capable of offering us.
So, who’s ready for some creative expression?


1 Comment