Diwali is a festival that lights up our lives with family togetherness, cleaning marathons, and an avalanche of sweets. Of course, let’s not forget the inevitable shopping sprees and the art of gift-giving that forms the climax of the Diwali festival.
Yet, the pièce de résistance of our festivities is the grand house transformation into a spectacle of lights. With my daughter leading the charge in crafting paper lanterns, diyas, and torans, and forcing me to order enough lights to light up the entire floor, our house shines brighter than a Bollywood premiere every year. All said and done, we always love the end result – A spotless, sparkling home on the day of Diwali.
How I Made the DIY Diwali Lantern? Inspiration Leads To Imagination…
This year, I took the reins, inspired by a previous DIY Clay Ganapati project, and decided that the Diwali show stopper – The Lantern, will be hand-crafted by me. My mentor, Nilesh sir, who previously guided us in making the clay Ganesha, volunteered to help me in this luminous endeavour. So, a week before Diwali, I kept aside all the time-pressed Diwali preparations and squeezed in 3 hours to make my own lantern, feeling a little bit like travelling in a Mumbai local. Nonetheless, it was a super fun and feel-good Diwali activity with the kids.
Soon, I found myself immersed in a world of paper, scissors, and glue. The result? A stunningly symmetrical masterpiece that now graces our living room balcony. But before you embark on your own lantern-making adventure, let me guide you with seven simple steps to achieve a sparkling Diwali project.
Material
- Coloured kite paper – 2 contrasting colours of your choice
- One sheet of golden paper
- 4 Golden Frames – Hand-made or sourced
- Glue
- Scissors
- String or wire
- Hole punch
- Decoration material – Laces, glitter paper, mirrors, or stickers
Step 1: Constructing the Frame
The foundation of any lantern is its frame. Whether sourced or handmade, a sturdy frame sets the stage for the entire project. For our project, we procured the frames from a vendor. Each lantern would require four frames
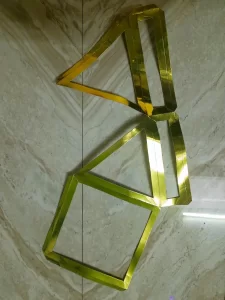
Tip: Ensure the frame is well-constructed and able to support the weight of the paper cutouts.
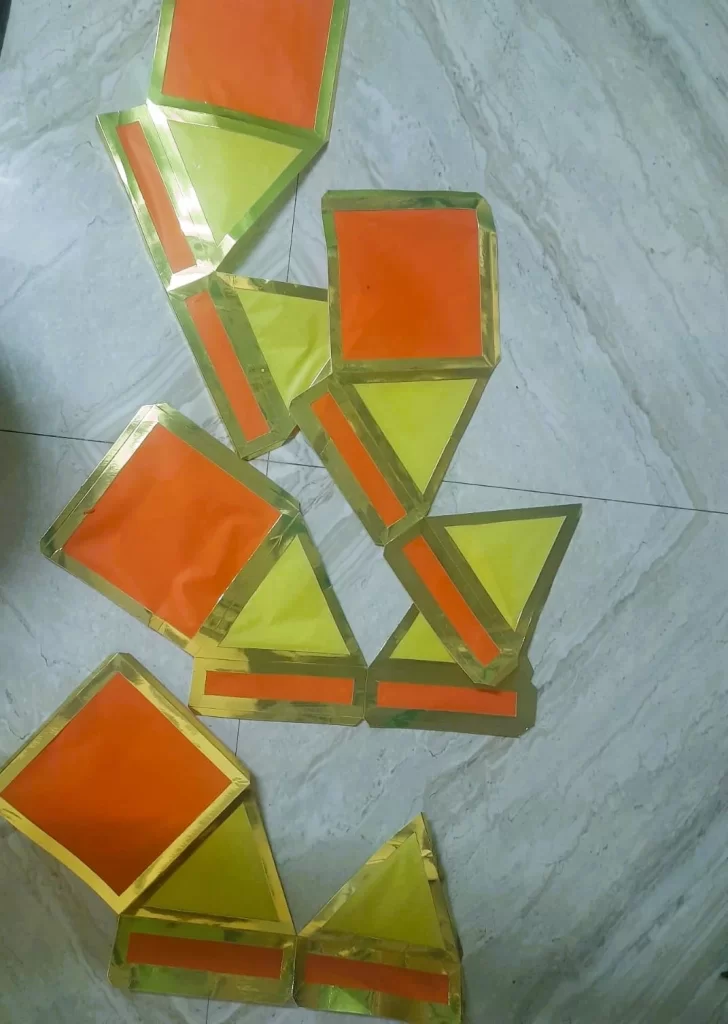
Step 2: Color with Cut-outs – The ‘Rang-Birangi’ Dilemma!
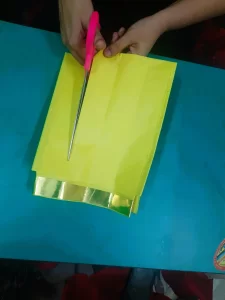
Adding vibrant colours is the next step. Choose two contrasting coloured papers for the lantern. For me, this was a super challenging part. It was a process of trial, and error, and a few questionable combinations that left me questioning my fashion sense. I selected Yellow and Orange – after all, our Indian festivals are about embracing vibrant hues!
Now let’s do some basic maths – we have 4 frames and each frame will have 4 cut-outs (2 triangles, 1 square and 1 rectangle). So, we need to have 16 paper cut-outs for our lantern.
Get ready with your scissors – the papers are waiting to take shape. Choose 1 colour for triangles and another colour for rectangles and squares. This will give you the desired contrast in the lantern. Ensure that the size of the cutouts matches the dimensions of the frame.
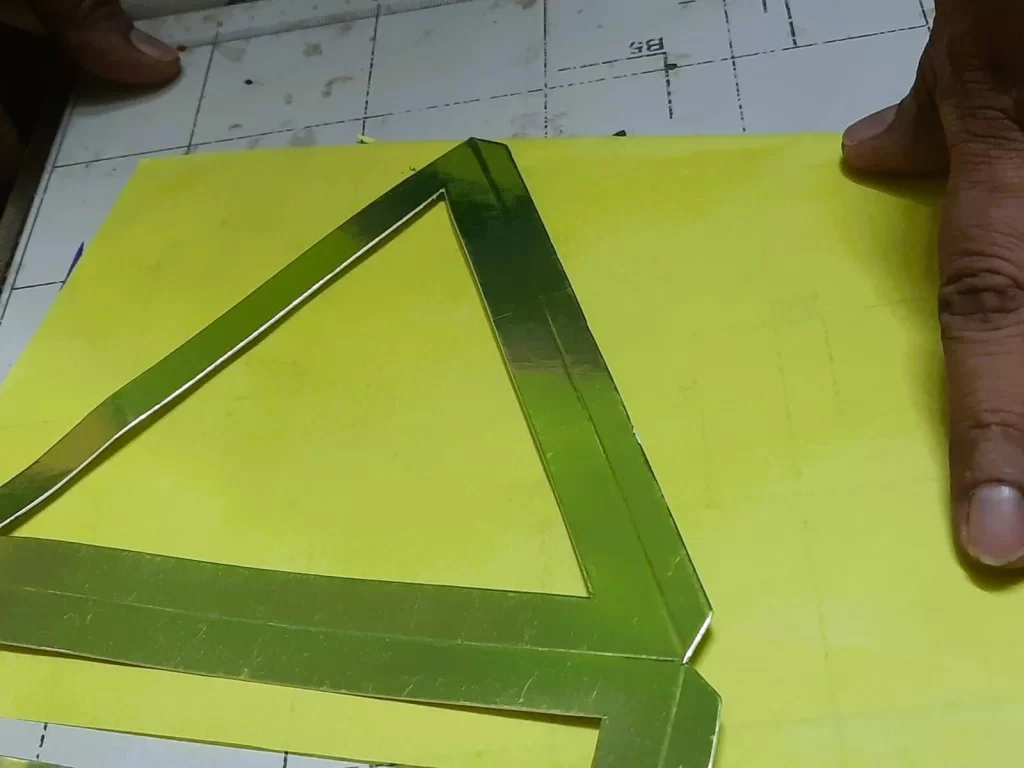
Tip: Cut the paper slightly larger to ensure proper adhesion to the frame.
Step 3: Stick The Cut-Outs To The Frames
The stage is set! We have got all the elements ready. Exit scissors and enter glue. Now, we stick the cut-outs to the frames securing the ends and pressing them well.
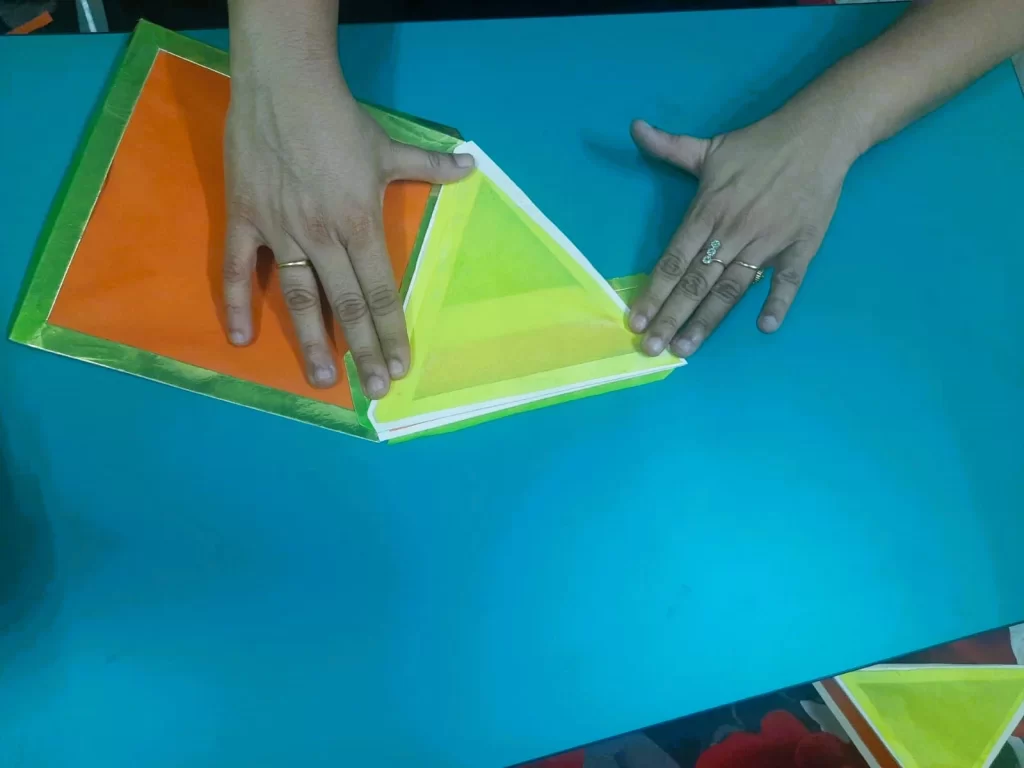
Tip: Take care to align them accurately for a polished look.
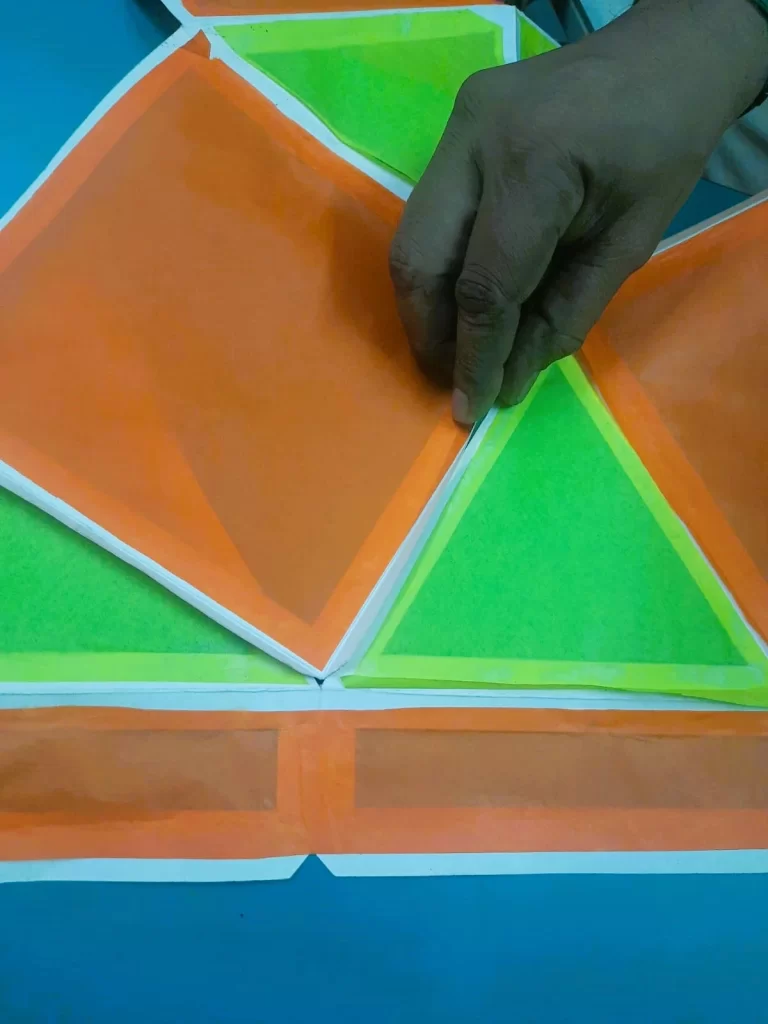
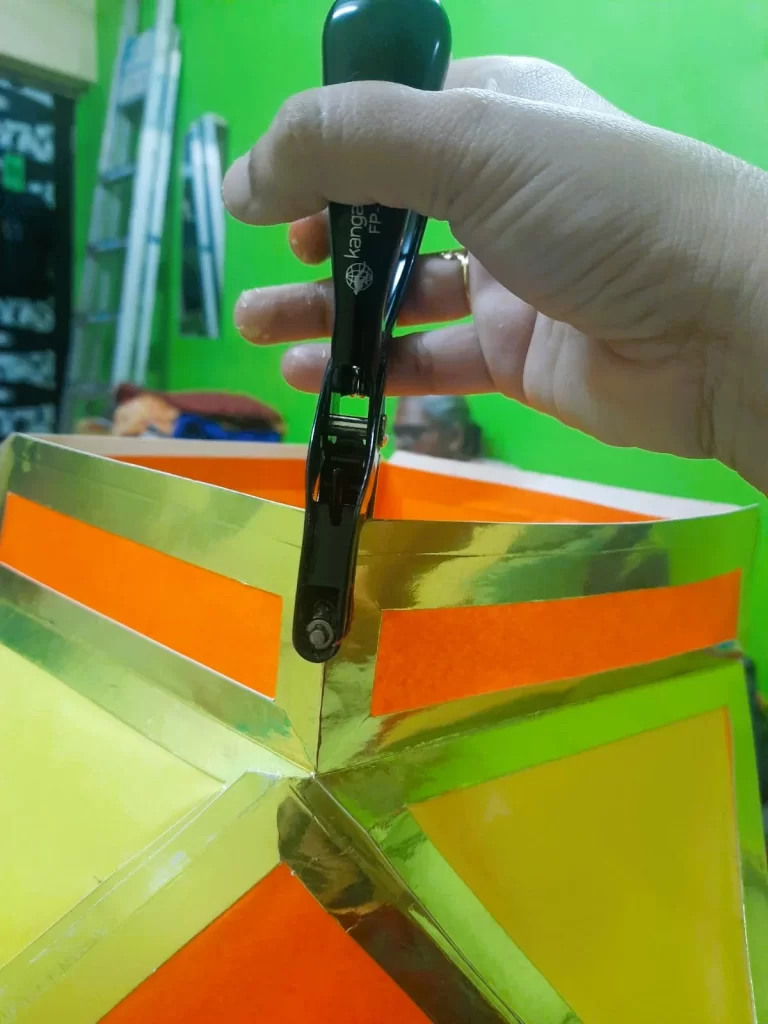
Step 4: Merging Cut-outs – Glue and More Glue!
Voila, you have prepped up your lantern and you now have 4 colourful pieces of frames. We now merge the frames. Applying glue at this stage felt like a suspense thriller and every corner glued was a step closer to a cinematic climax.
- Take a pair of frames and fit the square of one frame between the triangles of the other frame. Ensure a snug fit.
- Apply generous amounts of glue at the corners and along the edges, effectively joining the frames into a single piece. Press firmly to secure the bond.
- You have now merged 2 frames into 1. Repeat the process for the other pair of frame
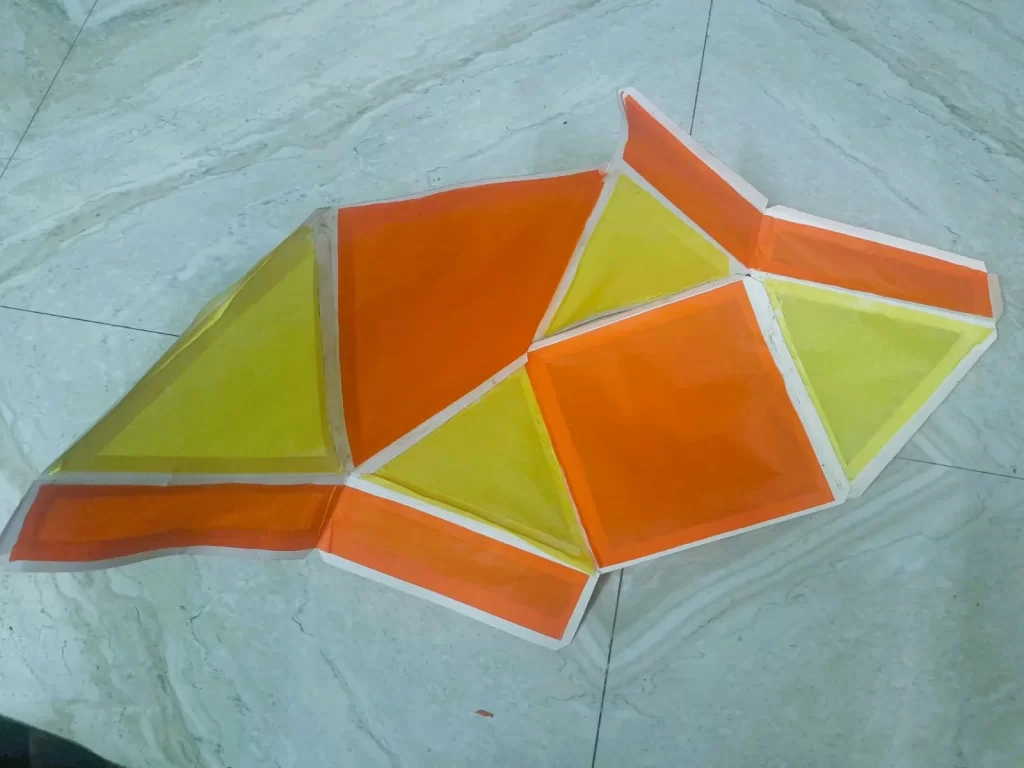
Step 5: The World is Round – Forming the Spherical Shape
You have successfully converted 4 frames into two beautiful geometrical pieces. Now is the final and the most important step – You have to stick these 2 pieces into one so that all the sides join to make a circular shape. This step required patience, precision, and maybe a little bit of pleading. But in the end, diplomacy won, and my lantern took shape. Much like the unity in ‘Lagaan,’ where diverse villagers come together to win a cricket match!
- Align the pairs of frames and carefully merge them to create a spherical structure. Take your time to ensure each side is firmly joined.
- Press the joints securely after applying glue to guarantee stability. This step is crucial for the overall structural integrity of the lantern.
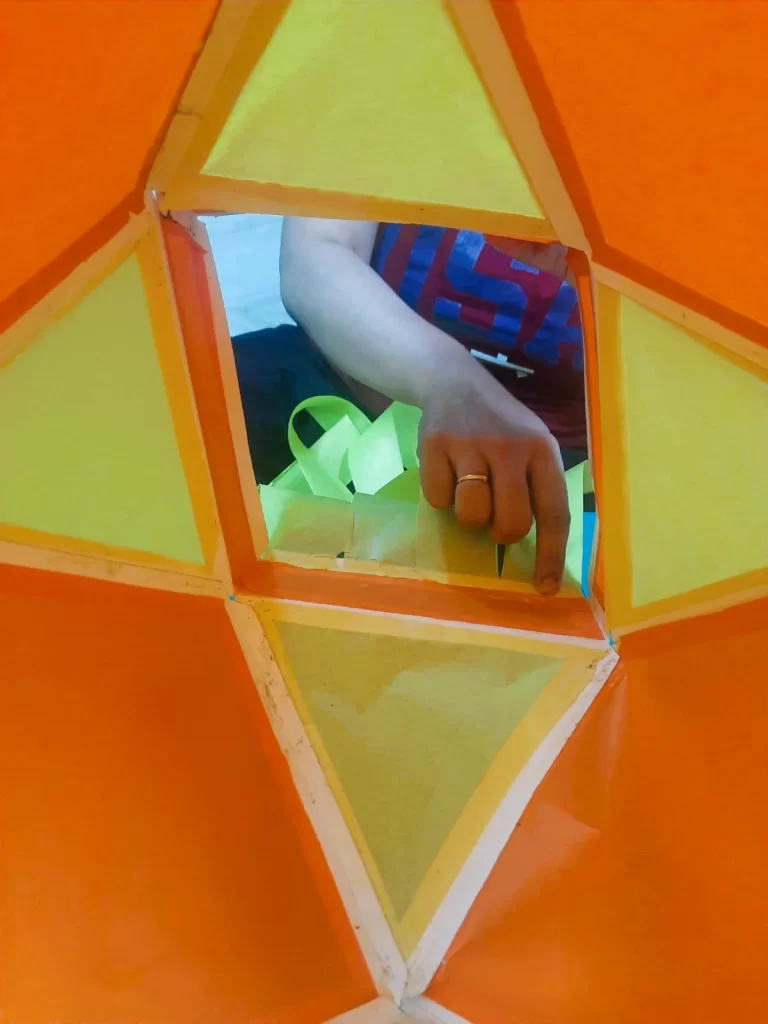
Step 6 – Make Tassels Of Colourful Garlands
Your beautiful ball of colour is ready. We now add a touch of drama to your creation by cutting out colourful strips of paper and accentuating them with golden edges. Shiny, sparkly, grand and super festive.
- Take a sheet of paper in your chosen colour and cut it into long strips. You’ll need a total of 16 strips.
- Cut the golden paper in a way that the ends of the strips appear golden. These will serve as decorative accents.
- Affix the golden strips along the edges of the coloured strips. Now, stick the strips inside of the main lantern structure, adding a touch of elegance and sparkle.
Step 7- Make Your Lantern Display Ready – Final Flourishes
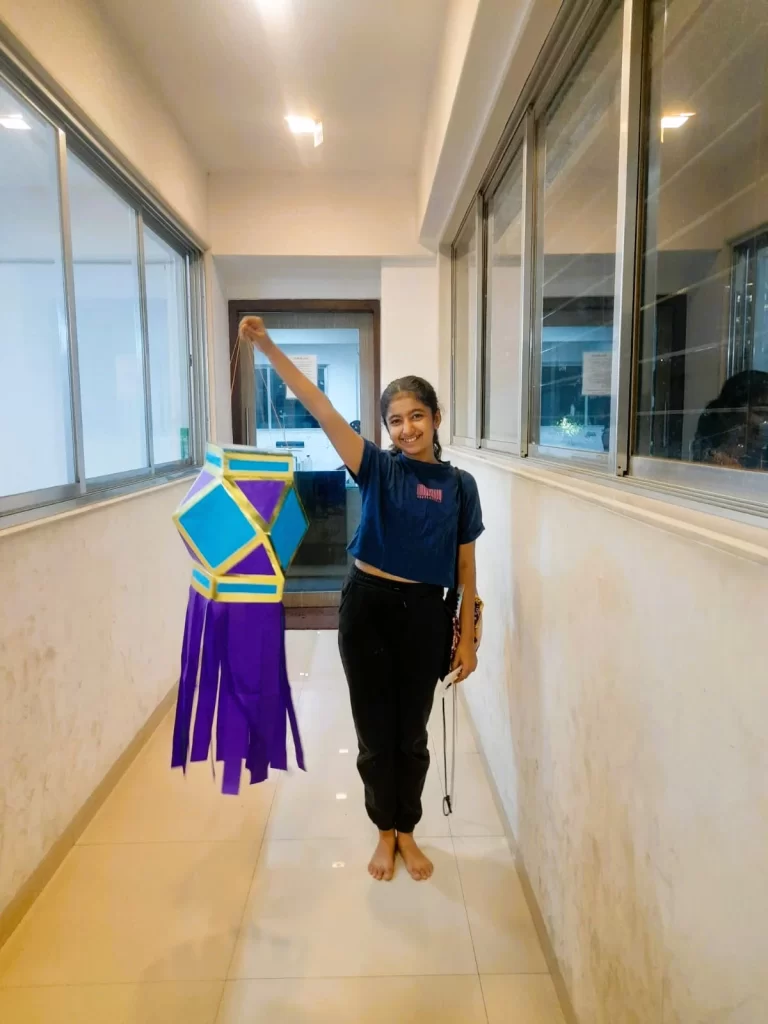
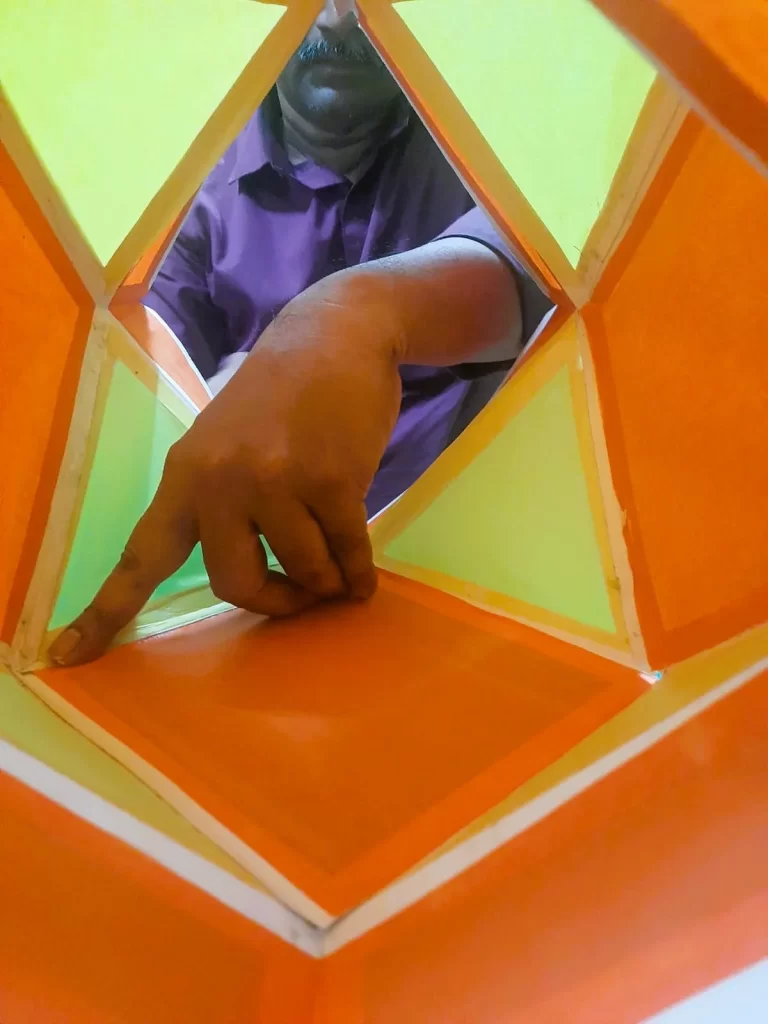
The lantern is now looking big, bright, and beautiful. The colours fill up the entire room and even without the light bulb inside, you are sure to fall in love with your creation. It’s show time for this newly created lantern so punch on all the sides, take a thread, and tie it up at the edge to make your lantern display ready.
Add finishing touches like mirrors, laces, or stickers to personalize your lantern further.
Tip: Pay attention to detail, as these small additions can make a big difference.
An Artful Finish: A Labor of Love (and a Few Glue Stains)
As I gazed upon my creation glowing in the dark, I couldn’t help but feel a sense of accomplishment. Sure, there were a few glue mishaps along the way, and maybe a rogue paper cut or two, but in the end, it was all worth it.

My lantern isn’t just a decoration; it is hand-made joy. All these years, when we bought lanterns, it was a mechanical activity for us. We bought it, admired it, and gave it its due position on the balcony. It never became a part of us – until today. And we are so going to set it up with some lovely fairy lights.
Creativity Is Just Connecting Things – In a New Way
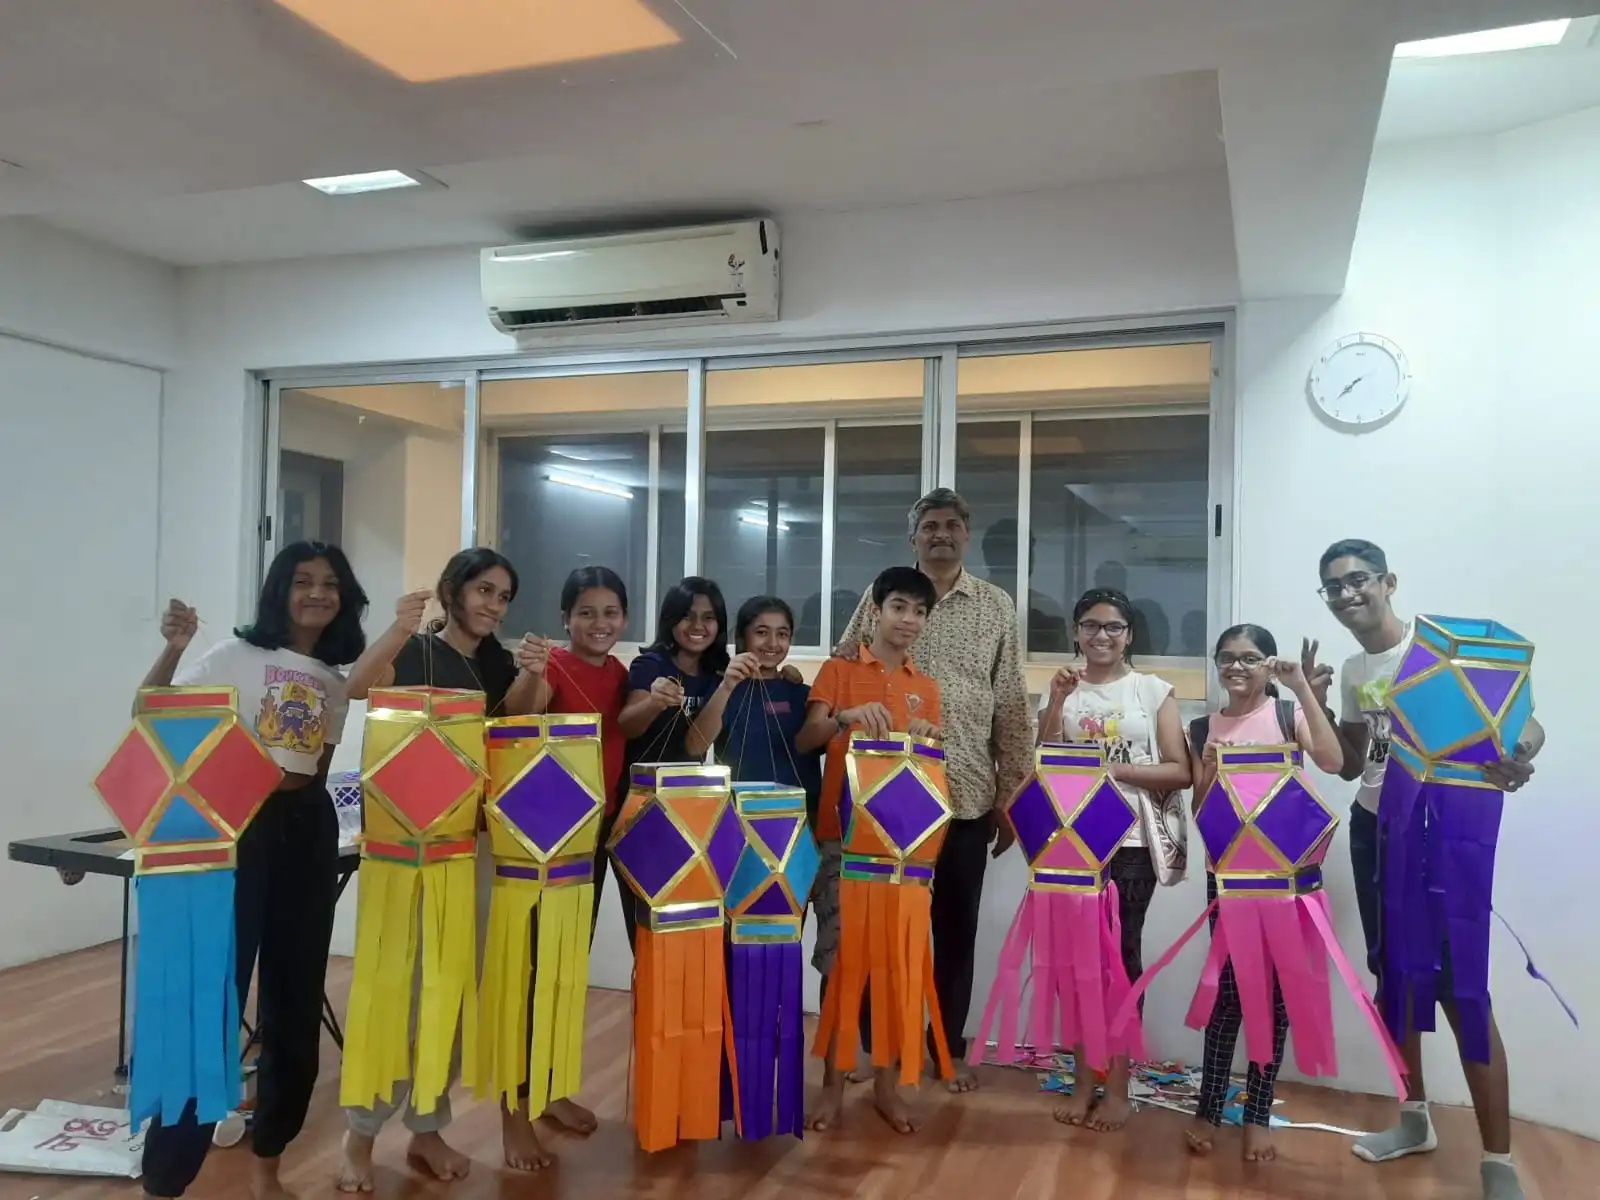
The process of crafting with hands and heart allowed for a deeper connection with this cherished tradition. Inspired by this experience, I even organized a lantern-making workshop for children in our society. Witnessing their hands and minds engrossed in their DIY projects was truly heartening. By day’s end, we were all a bit more patient and a bit more creative.
This Diwali, let’s not just light lamps, but also the creative fire within us. Working with our hands isn’t just good for the soul; it’s an adventure waiting to happen. So, grab your glue guns, and let’s craft a Diwali to remember!


[…] be the centrepiece of or can also subtly tie all the decor elements together. Try combining simple fairy lights with a colourful lantern, it’s tried and tested over generations and no wonder a hot favourite decor go-to even […]